Category Archives: Random Thoughts

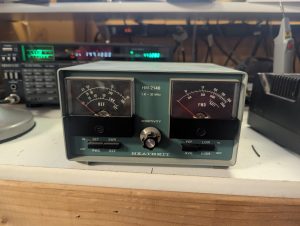
The Venerable Heathkit HM-2140 Swr/RF Meter

Here is another project I had sitting around the shack.  The Heathkit HM-2140 SWR/RF meter.  I really didn’t have to do too much on it.  Not even sure where I got it.  Mainly I had to remove the 9v battery, luckily it didn’t leak much acid.

Then I ordered a universal power supply for it.  I couldn’t find any of the original Heathkit Converter Model GRA-41-3s to power it.  The one I got isn’t a wallwart, it is more like a laptop charger.

Finally, I just did a little cleaning on it.  The case is in good shape with few scratches.

The plan is to use this at the building shack when we get that setup.  Should work great for HF

Till next time,
Allen
WD0DXD
73

Heathkit PS-23 Refurb

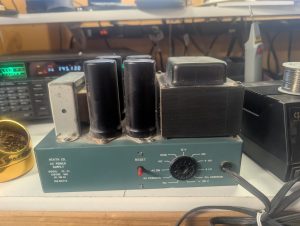
Continuing on my quest to finish projects that I have laying around the shack, I come upon a Heathkit PS-23 power supply.

Years ago I purchased a kit from oldheathkitparts.com to upgrade these venerable power supplies that where used for the HW-101 and SB-101 Transceivers of the same era.  It consisted of a PCB, capacitors, resistors and diodes that were used to replace almost all of the components of the power supply except for the top mounted transformer and choke.
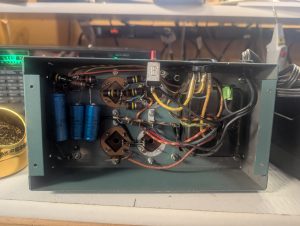
You can see what it looked like prior to the start of the operation.  The main caps where mounted on the top of the power supply and the rest of the components where mounted on the bottom of the power supply.  The instructions for the upgrade kit where delivered with the components on a cdrom.  For the most part they were pretty good, however this kit covered the HP-23 A, B, C and the PS-23 versions of the power supply and I had to decipher the instructions for the PS-23 model.
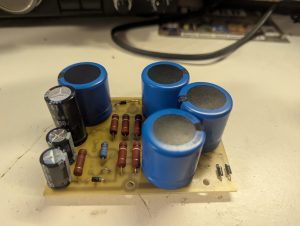


The picture to the right shows the PCB board populated with all of the components installed on it.

It was now ready to put in.  But first I had to depopulate the power supply of all of it’s existing components.
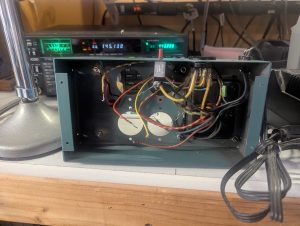
 

Here is the power supply with all of it’s previous components removed.  I had to be careful not to remove any more of the wires then I needed, since they would be re-used later.  All of the solder lugs where removed also.

If the one you are working on has an old frayed or cracked cord, this would be the time to replace that as well.
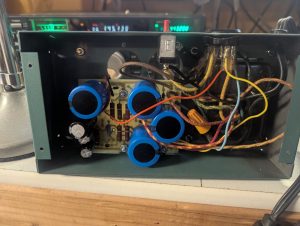


So this is a pic of the new PCB board installed.  I did have to extend some wires to reach the proper places.  I soldered and used some heat shrink tubing on those wires.  The kit came with some standards to raise the board from the frame of the power supply.

Remember you are working with very high voltage with this power supply so take proper precautions when doing this work.
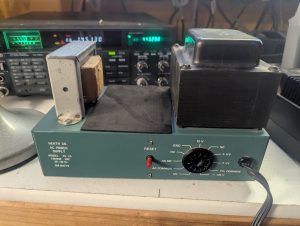


The pic to the left is the final product.  The kit came with a sheet of glue backed rubber material to apply over the holes on the top.

Over all it was an easy kit to put in and quite effective to extend the life of the power supply.

But Allen you say, when I go the the oldheathkitparts.com website it appears to have disappeared.  You are correct, I did purchase this years ago and it appears the owner has discontinued his production.

So what do you do? Well while I was working on this one, I found a Heathkit HP-23-A tucked away that I forgot about.  So I searched on the Internet and found that the Antique Wireless Association has produced a board for $20.00 with instructions and a BOM to do this upgrade.  So I purchased one and it is on the way.  So stay tuned for another Heathkit power supply refurb in the near future.

Allen

WD0DXD

73

Heathkit HD-1481 Cleanup and Repair

So I continue to go around the shack and find projects that I either started and didn’t finish, or that I got and didn’t start on.

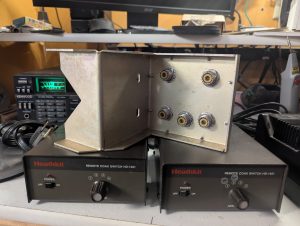
This time it is a Heathkit HD-1481 remote coax switch. Actually 2 and a half of them. I know I purchased the original set (controller and remote), but I think someone gave me the second controller. I checked out the first controller and just basically cleaned it up. Same with the Remote. The second controller I had to wire the switch correctly and the LED must have been replaced at one time. The leads were smaller than the original, so I had to use a dab of glue from a glue gun to keep the connector in place. Easy fix.

I am missing some of the u-bolt hardware on the remote, but I can figure that out when I eventually install it on the tower we are going to put up. The plan is to setup a station at our building that is just outside of town and run it there when we are on location or run it remotely.

Now for the second controller, I may just add some Arduino controls to it so we can remotely control it. That is a project for another time.

Thanks for dropping by.

73
Allen WD0DXD

Heathkit HM-102 and HM-2102 Refurb

I am kind of tied to the house for a few months due to some medical procedures. So I can’t get out to the shop and work.

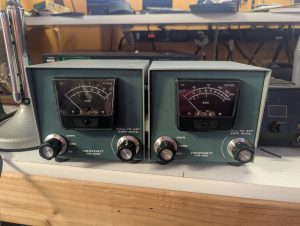
To keep myself busy, I have been going around the Ham Shack and working on some projects that have been started and abandoned for far too many years to mention. This week I worked on a pair of SWR/RF meters from Heathkit. The venerable HM-102 and HM-2102 meters.

The HM-102 just needed the cable replaced and a diode replaced. I used a 1N5711 in it. Having been sitting around for many years apart, I of course lost the case screws for both of them and had to go to the local ACE hardware and find some suitable replacements. After reassembly, the HM-102 was aligned on SWR and kind of the RF side. I need to find my RF probe and do a full alignment on the RF side yet, but it is pretty close.

The HM-2102 needed the most work. For some reason the builder did not install the D3 and C2 part of the internal alignment circuit. I installed a 12pF mica cap in C2 and a 1N5711 in D3. The next problem was the meter itself. I could not get it to zero with the front screw. I finally had to pop the front cover off and align it with the tab and then pop the cover back on. One foot was missing, so I designed the foot in openscad and printed it on my 3D printer using TPU filament. Finally I assembled it with the new fasteners from ACE and did an alignment using the internal alignment circuit that I had repaired.

These are going to be a great nostalgic addition to the shack.

Till next time.
73
WD0DXD

New Lights for the TS-790

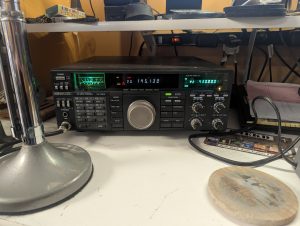
I had to replace the back lights on my Kenwood TS-790 again. I had replaced them with LEDs before, but I didn’t have the diffused ones then, so I just sanded them to make them not so bright. Well they went out again for whatever reason and I had to replace them again.

This time I ordered some diffused ones and replaced them. I ordered them about a year ago, but just finally got around to putting them in. It had been so long I forgot they were green. They are growing on me, I kind of think they are neat. You can kind of see them in the pic.

Let’s hope these last longer.

WD0DXD
73

New Site Title and Call Sign

Those of you that have been to my site before might be a bit confused. This site used to be called KBØASQ after my Amateur Radio Call Sign. After dragging my feet for awhile, I requested that the FCC reassign to me my original Call Sign WDØDXD.

It is the first call sign I had when I got my ticket in 1978. It wasn’t reassigned after I lost it when my novice license expired after the 2 year period that they were good for back then. They changed the rules and allowed you to reapply and keep the novice license if it had not been expired for more than 1 year or 2 (I don’t remember how long it was). So I reapplied and got a new sequential license.

Nothing has changed, just got the old call back and should have some new content ready for you soon.

73
Allen
WDØDXD

Second Week with the Genesis G59

Spent the last week or two working out some of the kinks on the G59.  I had run PSK-31 and JF65 and I was having really great success.  Made close to 100 contacts in a two week period and was getting great reports on my signal.

I had a few nagging problems the biggest being that at the start of transmission and end of transmission, I would get a HIGH SWR alert on the software.  It didn’t seem to be actually be high swr on the meter or on my external meter, so after awhile I just kind of ignored it.

Then I decided it was time to move forward and try and make some SSB contacts.  I ordered a Heil Proset 6 and when it came in, I thought I would be in business.  No such luck.

Every time I would try to transmit, the mux indication would come on and the SWR ALERT would show up and I would have no output.

To make a long story short, I spent the next three days trying to figure out what was going on.  With the help of Bruce and a couple of other people on the Yahoo Group, I finally figured out that I hadn’t completed the jumpers on the mic preamp circuit and since the Heil uses a HC-6 element which is dynamic, I needed to install a 1 uH blocking capacitor.  I built a little adapter with the blocking cap in it and viola, everything works great.

I made several contacts using SSB to Oregon and Nevada.  I received very good audio reports from both.  Really enjoy working with the kit.

Know what you want to do

It’s been almost a year since my last post.  To be honest, I wasn’t sure I even wanted to keep doing a blog.  I seem to get all excited and work on it for a couple of weeks and then life comes and smacks you in the face and it takes you a year to recover.

I won’t go into any personal details, but will give you a quick update on my ham activities.

First, the last few posts about the ham shack upgrade/redo.  Just ignore them.  I enjoyed it for about 11 months and then we decided that someone else in the house needed to have their own bedroom.  So the ham shack has moved out into the garage into my office.  While I enjoyed having the shack in the basement, it has worked out being in my office.  When I have a little down time from the business, I can turn around and work JT-65 and now JT-9.

Read more »

« Older Entries